MERCADOS FINANCIEROS

sábado, 23 de febrero de 2019

RMAN RESTORE CASO 2 Restaurar la base de datos sin archivo de control disponible


Caso 2. Restaurar la base de datos sin archivo de control disponible


Este método alternativo no es muy frecuente, ya que los backups incluyen un archivo de control, sin embargo pueden presentarse situaciones excepcionales en las cuales esté ausente el archivo de control.


Una opción es recuperar el archivo de control desde el archivo de log de RMAN. Cada copia de seguridad que se ejecuta genera un archivo de log el cual contiene los nombres y números de cada archivo de datos. Extrayendo esta información puede crearse un archivo de control nuevo sobre el cual se puede realizar catalogación de piezas y recuperación de la base de datos hasta un punto en el tiempo.

 El archivo de log muestra en qué pieza se encuentra cada uno de los archivos de datos a restaurar como lo muestra el texto en colores


...
RMAN> 2> 3> 4> 5> 6> 7>
starting full resync of recovery catalog
full resync complete
allocated channel: ch1
channel ch1: SID=409 device type=DISK
allocated channel: ch2
channel ch2: SID=600 device type=DISK
Starting backup at 08/05/2014 21:10:14
channel ch1: starting compressed full datafile backup set
channel ch1: specifying datafile(s) in backup set
input datafile file number=00014 name=+DG_DATA/fonpetp/datafile/ts_fonpet_movim.dbf
input datafile file number=00012 name=+DG_DATA/fonpetp/datafile/ts_fonpet_movim_02.dbf
input datafile file number=00002 name=+DG_DATA/fonpetp/datafile/sysaux01.dbf
input datafile file number=00006 name=+DG_DATA/fonpetp/datafile/indic_fonpet_param.dbf
input datafile file number=00009 name=+DG_DATA/fonpetp/datafile/ts_fonpet_param.dbf
input datafile file number=00001 name=+DG_DATA/fonpetp/datafile/system01.dbf
input datafile file number=00004 name=+DG_DATA/fonpetp/datafile/users01.dbf
channel ch1: starting piece 1 at 08/05/2014 21:10:16
channel ch2: starting compressed full datafile backup set
channel ch2: specifying datafile(s) in backup set
input datafile file number=00010 name=+DG_DATA/fonpetp/datafile/ts_fonpet_movim_01.dbf
input datafile file number=00005 name=+DG_DATA/fonpetp/datafile/indic_fonpet_movim_01.dbf
input datafile file number=00013 name=+DG_DATA/fonpetp/datafile/ts_fonpet_rep.dbf
input datafile file number=00015 name=+DG_DATA/fonpetp/datafile/ts_fonpet_movim_2.dbf
input datafile file number=00011 name=+DG_DATA/fonpetp/datafile/indic_fonpet_movim_02.dbf
input datafile file number=00007 name=+DG_DATA/fonpetp/datafile/indic_fonpet_movim.dbf
input datafile file number=00003 name=+DG_DATA/fonpetp/datafile/undotbs101.dbf
input datafile file number=00008 name=+DG_DATA/fonpetp/datafile/indic_fonpet_movim_reorg0.dbf
channel ch2: starting piece 1 at 08/05/2014 21:10:18
channel ch2: finished piece 1 at 08/05/2014 21:23:13
piece handle=/u03/backups/rman/fonpetp/full_FONPETP_v5p7q2ho_1_1_20140508.bak tag=TAG20140508T211014 comment=NONE
channel ch2: backup set complete, elapsed time: 00:12:55
channel ch1: finished piece 1 at 08/05/2014 21:31:23
piece handle=/u03/backups/rman/fonpetp/full_FONPETP_v4p7q2hn_1_1_20140508.bak tag=TAG20140508T211014 comment=NONE
channel ch1: backup set complete, elapsed time: 00:21:07
Finished backup at 08/05/2014 21:31:23
...


Se prepara el bloque de comandos PLSQL que restaura los archivos usando el paquete DBMS_BACKUP_RESTORE y la información obtenida del archivo de log. Aunque se puede hacer para todos los archivos en un solo bloque, se recomienda hacerlo por cada archivo. Nótese que en el archivo de log aparece el nombre de la pieza en donde se encuentra cada archivo de datos para construir el bloque.


[oracle@bdprod logs]$ sqlplus dba_fonpet as sysdba
Password:
Connected.
SYS@fonpetp> startup nomount;
ORACLE instance started.
Total System Global Area 1.0422E+10 bytes
Fixed Size    2237448 bytes
Variable Size 5670702072 bytes
Database Buffers 4731174912 bytes
Redo Buffers   18120704 bytes
SQL> DECLARE
  v_dev varchar2(50);
  v_done boolean;
  type t_fileTable is table of varchar2(255) index by binary_integer;
  v_fileTable t_fileTable;
  v_maxPieces number:=2;
BEGIN
  v_fileTable(1):='/u02/backup/rman/full_FONPETP_v5p7q2ho_1_1_20140508.bak';
  v_maxPieces:=2;
  v_dev:=sys.dbms_backup_restore.deviceAllocate(type=>null, ident=>'d1');
  sys.dbms_backup_restore.restoreSetDatafile;
  --dbms_backup_restore.RestoreDatafileTo(dfnumber => 1);
  dbms_backup_restore.RestoreDatafileTo( 1,'+DG_DATA/fonpetd/datafile/system01.dbf',0,'SYSTEM');
  FOR i IN 1..v_maxPieces LOOP
        sys.dbms_backup_restore.restoreBackupPiece(done=>v_done, handle=>v_fileTable(i), params=>null);
        IF v_done THEN
                GOTO all_done;
        END IF;
  END LOOP;
  <>
  sys.dbms_backup_restore.deviceDeallocate;
END;
/


Puede realizarse seguimiento de la restauración de cada archivo de datos usando la vista v$session_longops;


SYS@fonpetd>  select opname, time_remaining/60 mins
  2  from v$session_longops
  3  where time_remaining > 0;
OPNAME                                                                 MINS
---------------------------------------------------------------- ----------
RMAN: full datafile restore                                      4.31666667


En caso que sea necesario crear los directorios faltantes se procede desde asmcmd


[oracle@bddesarrollo rman]$ asmcmd mkdir +DG_FRA/fonpetp/
[oracle@bddesarrollo rman]$ asmcmd mkdir +DG_FRA/fonpetp/onlinelog/


Si la restauración se realiza con un nuevo nombre será necesario cambiar el parámetro db_name y las rutas respectivas, validar su existencia igualmente. En caso contrario que se desee conservar en nombre de la base de datos este paso no es necesario este paso.


SYS@fonpett> create pfile='/tmp/init.ora' from spfile='+DG_DATA/fonpett/spfilefonpett.ora';
File created.
SYS@fonpett> startup force nomount;
ORACLE instance started.
Total System Global Area 3206836224 bytes
Fixed Size    2232640 bytes
Variable Size 1493176000 bytes
Database Buffers 1694498816 bytes
Redo Buffers   16928768 bytes
SYS@fonpett> show parameter db_name
NAME     TYPE VALUE
------------------------------------ ----------- ------------------------------
db_name      string FONPETP
SYS@fonpett> exit
Disconnected from Oracle Database 11g Release 11.2.0.3.0 - 64bit Production
[oracle@bdpruebas ~]$ vi /tmp/init.ora
"/tmp/init.ora" 28L, 976C
*.audit_file_dest='/u01/app/oracle/admin/fonpett/adump'
*.audit_trail='db'
*.compatible='11.2.0.0.0'
*.control_files='+DG_DATA/fonpett/control01.ctl','+DG_FRA/fonpett/control02.ctl'
*.db_block_size=8192
*.db_create_file_dest='+DG_DATA'
*.db_domain=''
*.db_name='FONPETT'
*.db_unique_name='FONPETT'
*.diagnostic_dest='/u01/app/oracle'
*.dispatchers='(PROTOCOL=TCP) (SERVICE=fonpettXDB)'
*.open_cursors=300
*.pga_aggregate_target=1073741824
*.processes=400
*.remote_login_passwordfile='EXCLUSIVE'
*.sessions=445
*.sga_target=3221225472
*.standby_file_management='MANUAL'
*.undo_tablespace='UNDOTBS1'
17,1All892019879 65432
:q!
[oracle@bdpruebas ~]$ . oraenv
ORACLE_SID = [fonpett] ? fonpett
The Oracle base remains unchanged with value /u01/app/oracle
[oracle@bdpruebas ~]$ sqlplus dba_fonpet as sysdba
SQL*Plus: Release 11.2.0.3.0 Production on Mon Jun 16 14:35:33 2014
Copyright (c) 1982, 2011, Oracle.  All rights reserved.
Enter password: *********
Connected to:
Oracle Database 11g Release 11.2.0.3.0 - 64bit Production
With the Automatic Storage Management option
SYS@fonpett> startup force nomount pfile='/tmp/init.ora';
ORACLE instance started.
Total System Global Area 3206836224 bytes
Fixed Size    2232640 bytes
Variable Size 1493176000 bytes
Database Buffers 1694498816 bytes
Redo Buffers   16928768 bytes
SYS@fonpett> show parameter db_name
NAME     TYPE VALUE
------------------------------------ ----------- ------------------------------
db_name      string FONPETT
SYS@fonpett> create spfile from pfile='/tmp/init.ora';
File created.
SYS@fonpett> startup force nomount;
ORACLE instance started.
Total System Global Area 3206836224 bytes
Fixed Size    2232640 bytes
Variable Size 1493176000 bytes
Database Buffers 1694498816 bytes
Redo Buffers   16928768 bytes
SYS@fonpett> show parameter db_name
NAME     TYPE VALUE
------------------------------------ ----------- ------------------------------
db_name      string FONPETP
SYS@fonpett> exit
Disconnected from Oracle Database 11g Release 11.2.0.3.0 - 64bit Production


Se procede con la preparación y ejecución del comando para crear el archivo de control desde SQL Plus


[oracle@bdprod restaurar]$ sqlplus dba_fonpet as sysdba
Connected.
SYS@fonpetp> startup force nomount;
ORACLE instance started.
Total System Global Area 1.0422E+10 bytes
Fixed Size    2237448 bytes
Variable Size 5670702072 bytes
Database Buffers 4731174912 bytes
Redo Buffers   18120704 bytes
SYSfonpetp> CREATE CONTROLFILE SET DATABASE "FONPETT" RESETLOGS ARCHIVELOG
MAXLOGFILES 32 MAXLOGMEMBERS 3 MAXDATAFILES 100 MAXINSTANCES 8 MAXLOGHISTORY 2920
LOGFILE
       GROUP  1 ('+DG_DATA/fonpett/onlinelog/redo01a.rdo','+DG_FRA/fonpett/onlinelog/redo01b.rdo') SIZE 50M BLOCKSIZE 512,
       GROUP  2 ('+DG_DATA/fonpett/onlinelog/redo02a.rdo','+DG_FRA/fonpett/onlinelog/redo02b.rdo') SIZE 50M BLOCKSIZE 512,
       GROUP  3 ('+DG_DATA/fonpett/onlinelog/redo03a.rdo','+DG_FRA/fonpett/onlinelog/redo03b.rdo') SIZE 50M BLOCKSIZE 512,
       GROUP  4 ('+DG_DATA/fonpett/onlinelog/redo04a.rdo','+DG_FRA/fonpett/onlinelog/redo04b.rdo') SIZE 50M BLOCKSIZE 512,
       GROUP  5 ('+DG_DATA/fonpett/onlinelog/redo05a.rdo','+DG_FRA/fonpett/onlinelog/redo05b.rdo') SIZE 50M BLOCKSIZE 512,
       GROUP  6 ('+DG_DATA/fonpett/onlinelog/redo06a.rdo','+DG_FRA/fonpett/onlinelog/redo06b.rdo') SIZE 50M BLOCKSIZE 512,
       GROUP  7 ('+DG_DATA/fonpett/onlinelog/redo07a.rdo','+DG_FRA/fonpett/onlinelog/redo07b.rdo') SIZE 50M BLOCKSIZE 512,
       GROUP  8 ('+DG_DATA/fonpett/onlinelog/redo08a.rdo','+DG_FRA/fonpett/onlinelog/redo08b.rdo') SIZE 50M BLOCKSIZE 512,
       GROUP  9 '+DG_DATA/fonpett/onlinelog/redolog1.stb' SIZE 50M BLOCKSIZE 512,
       GROUP 10 '+DG_DATA/fonpett/onlinelog/redolog2.stb' SIZE 50M BLOCKSIZE 512,
       GROUP 11 '+DG_DATA/fonpett/onlinelog/redolog3.stb' SIZE 50M BLOCKSIZE 512,
       GROUP 13 '+DG_DATA/fonpett/onlinelog/redolog4.stb' SIZE 50M BLOCKSIZE 512,
       GROUP 14 '+DG_DATA/fonpett/onlinelog/redolog5.stb' SIZE 50M BLOCKSIZE 512,
       GROUP 15 '+DG_DATA/fonpett/onlinelog/redolog6.stb' SIZE 50M BLOCKSIZE 512,
       GROUP 16 '+DG_DATA/fonpett/onlinelog/redolog7.stb' SIZE 50M BLOCKSIZE 512,
       GROUP 17 '+DG_DATA/fonpett/onlinelog/redolog8.stb' SIZE 50M BLOCKSIZE 512,
       GROUP 18 '+DG_DATA/fonpett/onlinelog/redolog9.stb' SIZE 50M BLOCKSIZE 512
DATAFILE
       '+DG_DATA/fonpett/datafile/system01.dbf',
       '+DG_DATA/fonpett/datafile/systaux01.dbf',
       '+DG_DATA/fonpett/datafile/undotbs101.dbf',
       '+DG_DATA/fonpett/datafile/users01.dbf',
       '+DG_DATA/fonpett/datafile/indic_fonpet_movim_01.dbf',
       '+DG_DATA/fonpett/datafile/indic_fonpet_param.dbf',
       '+DG_DATA/fonpett/datafile/indic_fonpet_movim.dbf',
       '+DG_DATA/fonpett/datafile/indic_fonpet_movim_reorg0.dbf',
       '+DG_DATA/fonpett/datafile/ts_fonpet_param.dbf',
       '+DG_DATA/fonpett/datafile/ts_fonpet_movim_01.dbf',
       '+DG_DATA/fonpett/datafile/indic_fonpet_movim_02.dbf',
       '+DG_DATA/fonpett/datafile/ts_fonpet_movim_02.dbf',
       '+DG_DATA/fonpett/datafile/ts_fonpet_rep.dbf',
       '+DG_DATA/fonpett/datafile/ts_fonpet_movim.dbf',
       '+DG_DATA/fonpett/datafile/ts_fonpet_movim_2.dbf'
CHARACTER SET WE8ISO8859P1
;
Control file created.


Validar que todos los archivos de daros se encuentren matriculados en el archivo de control con tamaño y en estado ONLINE o RECOVER


SYS@fonpett> set lines 2000 pages 1000
SYS@fonpett> col name format a79
SYS@fonpett> select name, bytes, status from v$datafile;
NAME     BYTES STATUS
------------------------------------------------------------------------------- ---------- -------
+DG_DATA/fonpett/datafile/system01.dbf                  1126170624 SYSTEM
+DG_DATA/fonpett/datafile/systaux01.dbf                 1986002944 RECOVER
+DG_DATA/fonpett/datafile/undotbs101.dbf                3191865344 RECOVER
+DG_DATA/fonpett/datafile/users01.dbf                    187432960 RECOVER
+DG_DATA/fonpett/datafile/indic_fonpet_movim_01.dbf     5309988864 RECOVER
+DG_DATA/fonpett/datafile/indic_fonpet_param.dbf         594214912 RECOVER
+DG_DATA/fonpett/datafile/indic_fonpet_movim.dbf        3463774208 RECOVER
+DG_DATA/fonpett/datafile/indic_fonpet_movim_reorg0.dbf 2621440000 RECOVER
+DG_DATA/fonpett/datafile/ts_fonpet_param.dbf            104857600 RECOVER
+DG_DATA/fonpett/datafile/ts_fonpet_movim_01.dbf        8678146048 RECOVER
+DG_DATA/fonpett/datafile/indic_fonpet_movim_02.dbf     5146411008 RECOVER
+DG_DATA/fonpett/datafile/ts_fonpet_movim_02.dbf        3145728000 RECOVER
+DG_DATA/fonpett/datafile/ts_fonpet_rep.dbf             5242880000 RECOVER
+DG_DATA/fonpett/datafile/ts_fonpet_movim.dbf           3.4318E+10 RECOVER
+DG_DATA/fonpett/datafile/ts_fonpet_movim_2.dbf         5242880000 RECOVER
15 rows selected.


Se procede con la catalogación de piezas para recover.


[oracle@bddesarrollo dbs]$ rman target /
Recovery Manager: Release 11.2.0.3.0 - Production on Thu Jun 12 14:33:59 2014
Copyright (c) 1982, 2011, Oracle and/or its affiliates.  All rights reserved.
connected to target database: FONPETD (DBID=2150325182, not open)
RMAN> catalog start with '/u02/backup/rman';
using target database control file instead of recovery catalog
searching for all files that match the pattern /u02/backup/rman
List of Files Unknown to the Database
=====================================
File Name: /u02/backup/rman/full_FONPETP_v5p7q2ho_1_1_20140508.bak
File Name: /u02/backup/rman/full_FONPETP_v4p7q2hn_1_1_20140508.bak
File Name: /u02/backup/rman/archivelog_FONPETP_vcp7q44p_1_1_20140508.bak
Do you really want to catalog the above files (enter YES or NO)? YES
cataloging files...
cataloging done
List of Cataloged Files
=======================
File Name: /u02/backup/rman/full_FONPETP_v5p7q2ho_1_1_20140508.bak
File Name: /u02/backup/rman/full_FONPETP_v4p7q2hn_1_1_20140508.bak
File Name: /u02/backup/rman/archivelog_FONPETP_vcp7q44p_1_1_20140508.bak


Se define el punto de restauración, en este caso usando el último archivelog y se restauran los archive logs respectivos. Nótese que en la columna “Next SCN” aparece el número de SCN hasta el cual puede restaurarse la base de datos usando archive logs que equivale al punto de restauración de las 21:31:27


RMAN> list backup of archivelog all;
List of Backup Sets
===================
BS Key  Size       Device Type Elapsed Time Completion Time   
------- ---------- ----------- ------------ -------------------
2       262.36M    DISK        00:00:00     08/05/2014 21:37:29
        BP Key: 2   Status: AVAILABLE  Compressed: NO  Tag: TAG20140508T213135
        Piece Name: /u02/backup/rman/archivelog_FONPETP_vcp7q44p_1_1_20140508.bak
  List of Archived Logs in backup set 2
  Thrd Seq     Low SCN    Low Time            Next SCN   Next Time
  ---- ------- ---------- ------------------- ---------- ---------
  1    3580    68215578   08/05/2014 11:03:22 68218390   08/05/2014 11:17:05
  1    3581    68218390   08/05/2014 11:17:05 68219047   08/05/2014 11:17:11
  1    3582    68219047   08/05/2014 11:17:11 68220601   08/05/2014 11:25:59
  1    3583    68220601   08/05/2014 11:25:59 68221736   08/05/2014 11:32:42
  1    3584    68221736   08/05/2014 11:32:42 68225001   08/05/2014 11:56:51
  1    3585    68225001   08/05/2014 11:56:51 68228020   08/05/2014 12:17:07
  1    3586    68228020   08/05/2014 12:17:07 68233698   08/05/2014 12:59:44
  1    3587    68233698   08/05/2014 12:59:44 68234397   08/05/2014 12:59:50
  1    3588    68234397   08/05/2014 12:59:50 68235608   08/05/2014 13:05:11
  1    3589    68235608   08/05/2014 13:05:11 68245134   08/05/2014 14:26:51
  1    3590    68245134   08/05/2014 14:26:51 68255946   08/05/2014 16:01:05
  1    3591    68255946   08/05/2014 16:01:05 68257325   08/05/2014 16:08:14
  1    3592    68257325   08/05/2014 16:08:14 68260491   08/05/2014 16:31:42
  1    3593    68260491   08/05/2014 16:31:42 68264133   08/05/2014 17:00:07
  1    3594    68264133   08/05/2014 17:00:07 68277112   08/05/2014 18:44:19
  1    3595    68277112   08/05/2014 18:44:19 68287826   08/05/2014 20:17:55
  1    3596    68287826   08/05/2014 20:17:55 68295909   08/05/2014 21:31:27
RMAN> restore archivelog all;
Starting restore at 12-JUN-14
allocated channel: ORA_DISK_1
channel ORA_DISK_1: SID=200 device type=DISK
channel ORA_DISK_1: starting archived log restore to default destination
channel ORA_DISK_1: restoring archived log
archived log thread=1 sequence=3580
channel ORA_DISK_1: restoring archived log
archived log thread=1 sequence=3581
channel ORA_DISK_1: restoring archived log
archived log thread=1 sequence=3582
channel ORA_DISK_1: restoring archived log
archived log thread=1 sequence=3583
channel ORA_DISK_1: restoring archived log
archived log thread=1 sequence=3584
channel ORA_DISK_1: restoring archived log
archived log thread=1 sequence=3585
channel ORA_DISK_1: restoring archived log
archived log thread=1 sequence=3586
channel ORA_DISK_1: restoring archived log
archived log thread=1 sequence=3587
channel ORA_DISK_1: restoring archived log
archived log thread=1 sequence=3588
channel ORA_DISK_1: restoring archived log
archived log thread=1 sequence=3589
channel ORA_DISK_1: restoring archived log
archived log thread=1 sequence=3590
channel ORA_DISK_1: restoring archived log
archived log thread=1 sequence=3591
channel ORA_DISK_1: restoring archived log
archived log thread=1 sequence=3592
channel ORA_DISK_1: restoring archived log
archived log thread=1 sequence=3593
channel ORA_DISK_1: restoring archived log
archived log thread=1 sequence=3594
channel ORA_DISK_1: restoring archived log
archived log thread=1 sequence=3595
channel ORA_DISK_1: restoring archived log
archived log thread=1 sequence=3596
channel ORA_DISK_1: reading from backup piece /u02/backup/rman/archivelog_FONPETP_vcp7q44p_1_1_20140508.bak
channel ORA_DISK_1: piece handle=/u02/backup/rman/archivelog_FONPETP_vcp7q44p_1_1_20140508.bak tag=TAG20140508T213135
channel ORA_DISK_1: restored backup piece 1
channel ORA_DISK_1: restore complete, elapsed time: 00:00:03
Finished restore at 12-JUN-14
RMAN> exit;


A este punto los archive logs han quedado restaurados en el ASM (+DG_FRA/fonpetd/archivelog). Finalmente se realiza recover usando la metodología backup controlfile. Se debe especificar como punto de restauración SCN-1 para llegar al punto de consistencia que ofrece el backup.


SQL> alter database mount;
SQL> recover database using backup controlfile until change 68295908;
ORA-00279: change 68294119 generated at 05/08/2014 21:10:16 needed for thread 1
ORA-00289: suggestion :
+DG_FRA/fonpetd/archivelog/2014_06_12/thread_1_seq_3596.271.850055727
ORA-00280: change 68294119 for thread 1 is in sequence #3596
Specify log: {=suggested | filename | AUTO | CANCEL}
+DG_FRA/fonpetd/archivelog/2014_06_12/thread_1_seq_3596.271.850055727
Log applied.
Media recovery complete.


Se realiza apertura de la base de datos en modo solo lectura y se ejecuta una consulta al diccionario de datos para validar que está efectivamente accediendo a los archivos de datos sin problema. Se baja la instancia y se inicia de nuevo para dejar dando servicio.


SYS@fonpett> alter database open read only;
Database altered.
SYS@fonpetd> select name, bytes, status from v$datafile;
NAME                                                              BYTES STATUS
------------------------------------------------------------ ---------- -------
+DG_DATA/fonpetd/datafile/system01.dbf                       1168113664 SYSTEM
+DG_DATA/fonpetd/datafile/systaux01.dbf                      1986002944 ONLINE
+DG_DATA/fonpetd/datafile/undotbs101.dbf                     3191865344 ONLINE
+DG_DATA/fonpetd/datafile/users01.dbf                         187432960 ONLINE
+DG_DATA/fonpetd/datafile/indic_fonpet_movim_01.dbf          5309988864 ONLINE
+DG_DATA/fonpetd/datafile/indic_fonpet_param.dbf              594214912 ONLINE
+DG_DATA/fonpetd/datafile/indic_fonpet_movim.dbf             3463774208 ONLINE
+DG_DATA/fonpetd/datafile/indic_fonpet_movim_reorg0.dbf      2621440000 ONLINE
+DG_DATA/fonpetd/datafile/ts_fonpet_param.dbf                 104857600 ONLINE
+DG_DATA/fonpetd/datafile/ts_fonpet_movim_01.dbf             8678146048 ONLINE
+DG_DATA/fonpetd/datafile/indic_fonpet_movim_02.dbf          5146411008 ONLINE
+DG_DATA/fonpetd/datafile/ts_fonpet_movim_02.dbf             3145728000 ONLINE
+DG_DATA/fonpetd/datafile/ts_fonpet_rep.dbf                  5242880000 ONLINE
+DG_DATA/fonpetd/datafile/ts_fonpet_movim.dbf                3.4318E+10 ONLINE
+DG_DATA/fonpetd/datafile/ts_fonpet_movim_2.dbf              5242880000 ONLINE
SYS@fonpett> select count(*) from dba_segments;
  COUNT(*)
----------
      6046
SYS@fonpett> shutdown immediate;
Database closed.
Database dismounted.
ORACLE instance shut down.
SYS@fonpett> startup mount;
ORACLE instance started.
Total System Global Area 3206836224 bytes
Fixed Size                  2232640 bytes
Variable Size            1493176000 bytes
Database Buffers         1694498816 bytes
Redo Buffers               16928768 bytes
Database mounted.
SYS@fonpetd> alter database open resetlogs;
Database altered.
SYS@fonpetd> shutdown immediate;
Database closed.
Database dismounted.
ORACLE instance shut down.
SYS@fonpetd> startup
ORACLE instance started.

jueves, 21 de febrero de 2019

RESTORE RMAN

Restoring From Image Copies

Using image copy backups allow two recovery options.
  • Conventional restore and recovery : Image copies are copied from the backup location to the original datafile location, then they are recovered using any existing incremental backups and archived redo logs.
  • SWITCH ... TO COPY : To improve recovery time, the restore of the image copy can be omitted and the image copy can be used in place as the new datafile. The image copies must still be recovered using any existing incremental backups and archived redo logs, so only the file copy time is saved. Remember, if the image copy is used in place, you have lost your image copy backup!
Examples of conventional recoveries are shown below.
# Complete
RUN {
  SHUTDOWN IMMEDIATE;
  STARTUP MOUNT;
  RESTORE DATABASE;
  RECOVER DATABASE;
  ALTER DATABASE OPEN;
}

# Incomplete - Point In Time Recovery (PITR)
RUN { 
  SHUTDOWN IMMEDIATE;
  STARTUP MOUNT;
  SET UNTIL TIME "TO_DATE('15-NOV-2004 00:09:00','DD-MON-YYYY HH24:MI:SS')";
  #SET UNTIL SCN 1000;       # alternatively, you can specify SCN
  #SET UNTIL SEQUENCE 9923;  # alternatively, you can specify log sequence number
  RESTORE DATABASE;
  RECOVER DATABASE;
  ALTER DATABASE OPEN RESETLOGS;
}

DB_ULTRA_SAFE

SQL> select * from v$database_block_corruption;

CONFIGURACION DE PARAMETROS EN LA BASE DE DATOS

DB_ULTRA_SAFE sets the default values for other parameters that control protection levels.
Values
  • OFF
    When any of DB_BLOCK_CHECKINGDB_BLOCK_CHECKSUM, or DB_LOST_WRITE_PROTECT are explicitly set, no changes are made.
  • DATA_ONLY
    • DB_BLOCK_CHECKING will be set to MEDIUM.
    • DB_LOST_WRITE_PROTECT will be set to TYPICAL.
    • DB_BLOCK_CHECKSUM will be set to FULL.
  • DATA_AND_INDEX
    • DB_BLOCK_CHECKING will be set to FULL.
    • DB_LOST_WRITE_PROTECT will be set to TYPICAL.
    • DB_BLOCK_CHECKSUM will be set to FULL.
  • [oracle@localhost ~]$ rman target /

  • Recovery Manager: Release 12.1.0.1.0 - Production on Thu Feb 21 18:27:14 2019

  • Copyright (c) 1982, 2013, Oracle and/or its affiliates.  All rights reserved.

  • connected to target database: ACME (DBID=2033062067)

  • RMAN> validate database;

  • Starting validate at 21-FEB-19
  • using target database control file instead of recovery catalog
  • allocated channel: ORA_DISK_1
  • channel ORA_DISK_1: SID=216 device type=DISK
  • channel ORA_DISK_1: starting validation of datafile
  • channel ORA_DISK_1: specifying datafile(s) for validation
  • input datafile file number=00001 name=+DATA/ACME/DATAFILE/system.258.1000676203
  • input datafile file number=00003 name=+DATA/ACME/DATAFILE/sysaux.257.848597951
  • input datafile file number=00002 name=+DATA/ACME/DATAFILE/example.266.1000672081
  • input datafile file number=00004 name=+DATA/ACME/DATAFILE/undotbs1.260.848598093
  • input datafile file number=00006 name=+DATA/ACME/DATAFILE/users.259.848598091
  • channel ORA_DISK_1: validation complete, elapsed time: 00:00:16
  • List of Datafiles
  • =================
  • File Status Marked Corrupt Empty Blocks Blocks Examined High SCN
  • ---- ------ -------------- ------------ --------------- ----------
  • 1    OK     0              17647        101133          1969757   
  •   File Name: +DATA/ACME/DATAFILE/system.258.1000676203
  •   Block Type Blocks Failing Blocks Processed
  •   ---------- -------------- ----------------
  •   Data       0              65947           
  •   Index      0              13810           
  •   Other      0              3716            

  • File Status Marked Corrupt Empty Blocks Blocks Examined High SCN
  • ---- ------ -------------- ------------ --------------- ----------
  • 2    OK     0              34171        45840           1918839   
  •   File Name: +DATA/ACME/DATAFILE/example.266.1000672081
  •   Block Type Blocks Failing Blocks Processed
  •   ---------- -------------- ----------------
  •   Data       0              6788            
  •   Index      0              1219            
  •   Other      0              3662            

  • File Status Marked Corrupt Empty Blocks Blocks Examined High SCN
  • ---- ------ -------------- ------------ --------------- ----------
  • 3    OK     0              26437        97287           1969765   
  •   File Name: +DATA/ACME/DATAFILE/sysaux.257.848597951
  •   Block Type Blocks Failing Blocks Processed
  •   ---------- -------------- ----------------
  •   Data       0              17320           
  •   Index      0              10482           
  •   Other      0              43041           

  • File Status Marked Corrupt Empty Blocks Blocks Examined High SCN
  • ---- ------ -------------- ------------ --------------- ----------
  • 4    OK     0              129          9600            1969765   
  •   File Name: +DATA/ACME/DATAFILE/undotbs1.260.848598093
  •   Block Type Blocks Failing Blocks Processed
  •   ---------- -------------- ----------------
  •   Data       0              0               
  •   Index      0              0               
  •   Other      0              9471            

  • File Status Marked Corrupt Empty Blocks Blocks Examined High SCN
  • ---- ------ -------------- ------------ --------------- ----------
  • 6    OK     0              17           642             1769342   
  •   File Name: +DATA/ACME/DATAFILE/users.259.848598091
  •   Block Type Blocks Failing Blocks Processed
  •   ---------- -------------- ----------------
  •   Data       0              31              
  •   Index      0              5               
  •   Other      0              587             

  • channel ORA_DISK_1: starting validation of datafile
  • channel ORA_DISK_1: specifying datafile(s) for validation
  • including current control file for validation
  • including current SPFILE in backup set
  • channel ORA_DISK_1: validation complete, elapsed time: 00:00:01
  • List of Control File and SPFILE
  • ===============================
  • File Type    Status Blocks Failing Blocks Examined
  • ------------ ------ -------------- ---------------
  • SPFILE       OK     0              2               
  • Control File OK     0              612             
  • Finished validate at 21-FEB-19

  • RMAN> 

martes, 19 de febrero de 2019

VER ERRORES ORACLE

oerr ora 12544

[oracle@localhost dbs]$ oerr ora 12544
12544, 00000, "TNS:contexts have different wait/test functions"
// *Cause: Two protocol adapters have conflicting wait/test functions.
// *Action:  Not normally visible to the user. For further details, turn
// on tracing and reexecute the operation. If error persists, contact
// Oracle Customer Support.
[oracle@localhost dbs]$ 


oerr ora 12522

[oracle@localhost dbs]$ oerr ora 12522
12522, 00000, "TNS:listener could not find available instance with given INSTANCE_ROLE"
// *Cause: There are not any available and appropriate database instances 
// registered with the listener, that are part of the service identified by 
// SERVICE_NAME given in the connect descriptor and that have the specified 
// INSTANCE_ROLE (and INSTANCE_NAME, if specified). 
// *Action: Check to make sure that the INSTANCE_ROLE specified is correct. 
// Run "lsnrctl services" to ensure that the instance(s) have registered with 
// the listener and that they are ready to accept connections.
[oracle@localhost dbs]$ 


oerr rman 03009

3009, 1, "failure of %s command on %s channel at %s"
// *Cause:  This message should be accompanied by other error message(s)
//          indicating the cause of the error.
// *Action: Check the accompanying errors.
[oracle@localhost ~]$ 


sábado, 16 de febrero de 2019

BACKUP RECOVERY AREA

    REDUNDANCIA 

    BACKUP FILE SYSTEM

    RMAN> BACKUP RECOVERY AREA  TO DESTINATION '/u01/backup/';
    RMAN> BACKUP RECOVERY FILES TO DESTINATION '/u01/backup/';

    BACKUP CINTA

    RMAN> BACKUP DEVICE TYPE sbt BACKUPSET ALL;
    

    NOTA: CUANDO LA INSTANCIA ESTA EN +ASM NO SE PUEDE REALIZAR ESTE COMANDO "BACKUP RECOVERY AREA" "BACKUP RECOVERY FILES"

    RMAN> backup recovery area;

    Starting backup at 20-APR-20
    using channel ORA_DISK_1
    specification does not match any datafile copy in the repository
    RMAN-00571: ===========================================================
    RMAN-00569: =============== ERROR MESSAGE STACK FOLLOWS ===============
    RMAN-00571: ===========================================================
    RMAN-03002: failure of backup command at 04/20/2020 20:37:04
    RMAN-06603: TO DESTINATION option must be specified with RECOVERY AREA, RECOVERY FILES or DB_RECOVERY_FILE_DEST on disk device

    RMAN> 


lunes, 4 de febrero de 2019

CREATE INDEX PARALLEL NOLOGGING

Index create speed:  performance factors


Parallel option ? This option allows for parallel processes to scan the table.  When an index is created, Oracle must first collect the symbolic key/ROWID pairs with a full-table scan.  By making the full-table scan run in parallel, the index creation will run many times faster, depending on the number of CPUs, table partitioning and disk configuration.  I recommend a n-1 for the degreeoption, where n is the number of CPUs on your Oracle server.  In this example we create an index on a 36 CPU server and the index create twenty times faster:

CREATE INDEX cust_dup_idx
   ON customer(sex, hair_color, customer_id)
PARALLEL 35;


Nologging option ? The nologging option bypasses the writing of the redo log, significantly improving performance.  The only danger with using nologging is that you must re-run the create index syntax if you perform a roll-forward database recovery.  Using nologging with create index can speed index creation by up to 30%

CREATE INDEX cust_dup_idx
   ON customer(sex, hair_color, customer_id)
PARALLEL 35
NOLOGGING;

sábado, 2 de febrero de 2019

BACKUP AS COPY A FILE SYSTEM

RMAN Image Copies

There are several ways to create an image copy

Using the FORMAT clause

For example:
BACKUP AS COPY DATABASE FORMAT '/u01/backup/%U';

viernes, 1 de febrero de 2019

DBMS_STATS

 EXEC DBMS_STATS.gather_table_stats('HR', 'EMPLOYEES');
 EXEC dbms_stats.gather_index_stats('HR, 'EMP_NAME_IX');

martes, 29 de enero de 2019

MOVER AUDITORIA 12c

select table_name,tablespace_name from dba_tables where TABLE_NAME='AUD$';

select table_name,tablespace_name from dba_tables where TABLE_NAME='FGA_LOG$';

select table_name,tablespace_name from dba_tables where TABLE_NAME in ('AUD$','FGA_LOG$')

OPCION 1


TABLE_NAME TABLESPACE_NAME

------------------------------ ------------------------------
AUD$ AUDITORIA


SQL> alter table sys.aud$ move tablespace AUDITORIA;

Table altered.

VERSION 11G
SQL> alter table sys.fga_log$ move tablespace AUDITORIA;

alter table sys.fga_log$ move tablespace AUDITORIA

*
VERSION 12C
OPCION 2 (MEJOR PRACTICA)


BEGIN
  DBMS_AUDIT_MGMT.set_audit_trail_location(
    audit_trail_type           => DBMS_AUDIT_MGMT.AUDIT_TRAIL_FGA_STD,
    audit_trail_location_value => 'AUDITORIA');
END;
/

VALIDAR SI ESTA ACTIVA LA AUDITORIA VERSION 12C

select value from v$option where parameter = 'Unified Auditing'


LIMIPIAR AUDITORIA UNIFICADA

SQL> execute dbms_audit_mgmt.flush_unified_audit_trail 

PL/SQL procedure successfully completed.


lunes, 28 de enero de 2019

Create AWR report to compare two time periods


Create AWR report to compare two time periods

Oracle Database Tips by Donald BurlesonDecember 14, 2015
Question:  A plain AWR report compares two points in time, but I want to generate an AWR report that compares two distinct time periods.  For example, I want an AWR report showing changes between 3:00 PM and 4: PM last Wednesday and Thursday.  How do I get an AWR report that compares two elapsed time periods?
Answer:  The awrddrpt.sql report is the Automated Workload Repository Compare Period Report. The awrddrpt.sql script is located in the $ORACLE_HOME/rdbms/admin directory. 
For example, is we wanted to compare the period between 3:00 PM-4:00 PM for Wednesday to the same time period on Thursday, we could use the awrddrpt.sql script.
Specify the First Pair of Begin and End Snapshot Ids
~~~~~~~~~~~~~~~~~~~~~~~~~~~~~~~~~~~~~~~~~~~~~~~~~~~~
Enter value for begin_snap: 13747
First Begin Snapshot Id specified: 13747

Enter value for end_snap: 13749
First End Snapshot Id specified: 13748

Specify the Second Pair of Begin and End Snapshot Ids
~~~~~~~~~~~~~~~~~~~~~~~~~~~~~~~~~~~~~~~~~~~~~~~~~~~~~
Enter value for begin_snap2: 13915
Second Begin Snapshot Id specified: 13915

Enter value for end_snap2: 13917
Second End Snapshot Id specified: 13916

Here is an example of an awrddrpt.sql report  showing how two AWR reports are compared.

viernes, 25 de enero de 2019

TRIGGER AFTER LOGON

CREATE OR REPLACE TRIGGER LOG_T_LOGON
AFTER LOGON ON DATABASE
DECLARE
    osUser VARCHAR2(30);
    machine VARCHAR2(100); 
    prog VARCHAR2(100);
    ip_user VARCHAR2(15);
BEGIN
    SELECT OSUSER, MACHINE, PROGRAM, ora_client_ip_address
    INTO osUser, machine, prog, ip_user
    FROM v$session
    WHERE SID = SYS_CONTEXT('USERENV', 'SID');

    IF (osUser = 'APuente' AND prog = 'SQL Developer')THEN
        RAISE_APPLICATION_ERROR(-20000,'Denied!  You are not allowed to logon from host '||prog|| ' using '|| osUser);
    END IF;
END;
/

lunes, 21 de enero de 2019

BACKUP CONTROLFILE TO TRACE BACKUP CURRENT CONTROLFILE

SQL> alter database backup controlfile to trace as '/u01/backup/control.trc';

Database altered.


SQL> alter database backup controlfile to trace;

LUEGO DE EJECUTAR ESTO DEBEMOS IR A LAS VISTA V$DIAG_INFO Y CONSULTAR LA RUTA TRACE QUE ES DONDE GENERA LA COPIA

NOTA: BUSCAR X FECHA   SID_ORA_###.trc


RMAN> BACKUP AS COPY CURRENT CONTROLFILE FORMAT '/u01/backup/controlfile.bck';

Starting backup at 21-JUL-20
using channel ORA_DISK_1
channel ORA_DISK_1: starting datafile copy
copying current control file
output file name=/u01/backup/controlfile.bck tag=TAG20200721T204557 RECID=1 STAMP=1046378759
channel ORA_DISK_1: datafile copy complete, elapsed time: 00:00:03
Finished backup at 21-JUL-20

Starting Control File and SPFILE Autobackup at 21-JUL-20
piece handle=+FRA/ACME/AUTOBACKUP/2020_07_21/s_1046378761.298.1046378761 comment=NONE
Finished Control File and SPFILE Autobackup at 21-JUL-20

RMAN> 


Oracle Database 12c: EM Database Express

Oracle Database 12c: EM Database Express


Oracle Enterprise Manager Database Express, also referred to as EM Express, is a web-based tool for managing Oracle Database 12c. Built inside the database server, it offers support for basic administrative tasks such as storage and user management, and provides comprehensive solutions for performance diagnostics and tuning.. 

EM Express Architecture

EM Express is designed to be lightweight and to incur minimal overhead on the database server. In order to achieve this goal, EM Express is built inside the Oracle Database and only uses internal infrastructure components. . such as XDB and SQL*Net. It does not require any separate middle-tier components.

Since EM Express is built inside the database, the database has to be open in order to use EM Express, and EM Express cannot perform actions outside the database.

EM Express does not have background tasks or processes that periodically collect information. Instead, it utilizes data that is already collected by the database. Data is requested only when the user interacts with the UI and all UI processing is done in the browser, thus minimizing load on the database server.

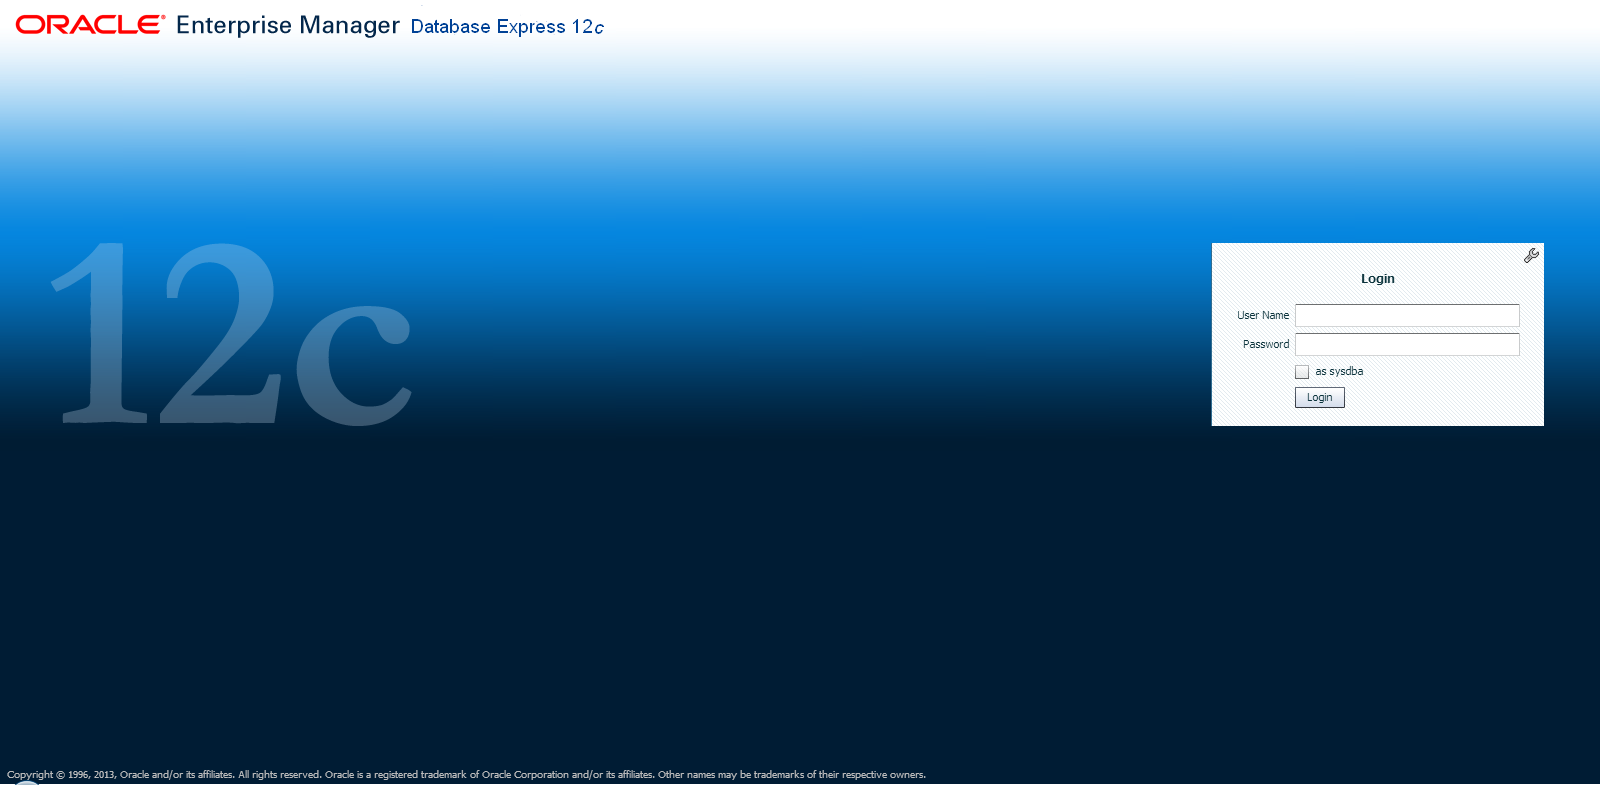
EM Express Login

EM Express introduces two key features:
The Performance Hub provides a consolidated view of all performance data for a given time range.  The performance data shown includes ASH Analytics, SQL Monitor, ADDM, as well as metrics that describe workload characteristics and database resource usage.  For more information, see the section on Performance Hub

A Composite Active Report is a single HTML file that embeds a set of correlated active reports, allowing the user to navigate from one active report to another without requiring a connection to the database.  Composite Active Reports are a significant enhancement to the Active Report technology introduced in Oracle Database 11g.  For more information, see the section on Composite Active Reports.

In order to assist a Database Administrator, EM Express also provides support for basic administrative tasks such as storage and user management.  For more information, see the section on EM Express Administration Functions.

    Frequently Asked Questions

      Answers

      How do I log into EM Express?

      A user can log into EM Express by using a browser and opening the URL to https://:/em.  A login page will be displayed, and the user can log in with any valid DB credential.


      How can I find the port on which EM Express is configured?

      When dbca completes, it indicates the port on which EM Express is configured.  If that information is no longer available, there are two ways to find the HTTP/HTTPS port for EM Express:
      > lsnrctl status | grep HTTP
        (DESCRIPTION=(ADDRESS=(PROTOCOL=tcps)(HOST=xxx.us.oracle.com)(PORT=5500))(Security=(my_wallet_directory=/u01/oracle/app/oracle/admin/orcl/xdb_wallet))(Presentation=HTTP)(Session=RAW))
      or from SQL*Plus:
      SQL> select dbms_xdb.getHttpPort() from dual;
      GETHTTPPORT
      -----------
             8080

      SQL> select dbms_xdb_config.getHttpsPort() from dual;


      GETHTTPSPORT
      ------------
              5500


      How can I give users read-only access to EM Express?

      To grant users read-only access so that they can view the UI but not make any changes, grant them the EM_EXPRESS_BASIC role as follows:
      SQL> grant EM_EXPRESS_BASIC to ;


      Does EM Express have support for RAC?

      Yes.  EM Express is a database management tool that is automatically RAC-aware.  When connected to a RAC system, the information displayed is for the entire database, i.e. for all instances.  For example, the average active session values is aggregated across all instances.  In addition, an extra Instances tab is displayed in the Performance Region on the DB Home Page to show the distribution of average active sessions across instances.

      How can I configure EM Express on CDB and PDB?

      Users can configure EM Express both at the root and the PDB containers, with each container using a different HTTP/HTTPS port.  When connected to the root container, the information displayed is for the entire database including all PDBs.  When connected to a PDB, the information displayed is restricted to data for the PDB.  For more information, see the section on EM Express on CDB.

      Do I need any database privileges to use EM Express?

      In order to use EM Express, a database user needs to have been granted the EM_EXPRESS_BASIC or EM_EXPRESS_ALL role.  The DBA role includes both the EM_EXPRESS_BASIC and the EM_EXPRESS_ALL roles.
      EM_EXPRESS_BASIC grants a user read-only privileges, so that the user can view pages but not perform any actions.  EM_EXPRESS_ALL grants a user all privileges required to perform any action in EM Express.


      Do I need licenses or packs to use EM Express?

      You can use the basic administration features offered by EM Express with no additional licenses.  However, to use the performance features, you will need the Oracle Diagnostics Pack.  For the Performance Hub, you will need the Diagnostics Pack and for the SQL Monitor and SQL Tuning Advisor features, you will need the Tuning Pack.
      Depending on what packs you own, you should set the control_management_pack_access init.ora parameter on your system.  For example, if you have the Diagnostics Pack, but not the Tuning Pack, you should set the control_management_pack_access parameter=DIAGNOSTIC.


      Is EM Express supported on Oracle Database Standard Edition?  What about Database XE?

      Yes, EM Express is supported on both Standard Edition (SE) and Express Edition (XE).  However, features that require the Diagnostics and Tuning Packs will not be available on SE and XE.  For example, the Performance Menu won't be available on SE and XE because the features require the Diagnostics or Tuning Packs.  Similarly, certain regions of the Home Page, such as the SQL Monitor List, will not be shown on SE and XE because they require the Tuning Pack.


      When using EM Express on RAC, how can I see instance-specific information?

      Although EM Express is RAC-aware in general, some pages will allow you to view instance-specific information as well.  There are two ways to get to this instance-specific information.

      The first way is using the Status Region in the Home Page.  You can click the "RAC - instance(s) up" link and it will take you to a page with the instance details.  You can now select an instance and navigate to the Performance Hub, the Instance Home Page, or the Memory Page for the selected instance.

      The second way is through the Performance Hub.  If you click the RAC tab, you will see a list of instances.  From this list, you can now select an instance and navigate to the Performance Hub, the Instance Home Page, or the Memory Page for the selected instance.

      For Undo Details, the information is always instance-specific.  When you navigate to the Undo Management page using the Storage menu, you are taken to a page that lists all the instances and the undo summary information for each instance.  You can now select an instance and navigate to the Undo Details Page for the selected instance.


      EM Express seems slow when using HTTPS.  Why?

      Some browsers disable caching if you are using SSL and have a self-signed certificate.  This is known to occur on Chrome and Safari.  To avoid this issue, use a CA certificate when using HTTPS or use a browser that supports caching when using self-signed certificates (Firefox or IE).


      Can I run EM Express in Safari?

      Yes, you can run EM Express in Safari on MacOS.  You can also run EM Express in Safari 5.0.* on Windows, but Safari 5.1.* on Windows is known to have an issue with input text fields that prevents users from entering their username and password on the login page


      What is the recommended screen resolution for EM Express?

      Although the EM Express UI dynamically resizes based on the screen real-estate available, it works best with resolutions of at least 1280x1024 or 1600x900.


      How do I set up EM Express?

      DBCA allows you to set up EM Express at the time of database creation.

      If you want to manually set up EM Express, simply configure the HTTPS or HTTP port by logging into the database and setting the port:
      SQL> exec dbms_xdb_config.sethttpsport(5500);

      or

      SQL> exec dbms_xdb_config.sethttpport(8080);
      If you are using a listener TCP port other than 1521, you will also need to set the dispatchers and local_listener initialization parameters.  Please see the documentation for further information.

      I'm trying to perform a task I used to do in DB Control.  Where is it in EM Express?

      Although EM Express provides support for basic administrative tasks, it is not a direct replacement for DB Control.  As explained in the Architecture section, EM Express is built inside the database server and cannot perform actions outside the database.  Also, EM Express is focused primarily on providing performance management and monitoring functionality, and is not meant to be an all-around database administration tool.


      Is EM Express secure?

      Yes, EM Express uses SSL (HTTPS) out of the box.


      Why am I getting a "This Connection is untrusted" message when I try to log into EM Express?  Is this a security concern?

      The browser displays this message if you are using a self-signed certificate.  You can either create an exception for it, or you can replace the default wallet/certificate with a trusted certificate.  See the documentation for more information.


      How can I replace the default wallet/certificate?

      The XDB wallet is stored in the $ORACLE_BASE/admin//xdb_wallet directory .  If ORACLE_BASE is not defined, the XDB wallet is stored in $ORACLE_HOME/admin//xdb_wallet, where is the unique database name.


      What should I do if the default XDB wallet expires?

      If the wallet expires, you can create a new wallet with an existing SSL certificate and replace the existing wallet with the new one.  Alternatively, you can use dbms_xdb.installDefaultWallet() to replace the existing wallet with a new Oracle wallet that has a self-signed certificate.


      martes, 15 de enero de 2019

      TAMANO TABLAS


      SQL> execute dbms_stats.gather_schema_stats('HR');

      PL/SQL procedure successfully completed.

      SQL> 


      SQL> execute dbms_stats.gather_table_stats('HR','EMPLOYEES');

      PL/SQL procedure successfully completed.


      SQL> select num_rows, blocks*8192/1024/1024 mb from dba_tables where table_name = 'EMPLOYEES';

        NUM_ROWS    MB
      ---------- ----------
             107   ,0390625


      SQL> select num_rows, blocks*8192/1024/1024 mb from dba_tables where table_name = 'EMPLOYEES';

      NUM_ROWS MB

      —————————— ——————————

      10308870 1522.625

      EJEMPLOS ROWNUM


      first sort the rows and then extract five rows from that sorted dataset.
      SQL> select *

      2 from (

      3 select question_id, created

      4 from asktom.ate_submitted_questions

      5 order by created desc

      6 )

      7 where rownum <= 5;


      Listing 4: Disk size of total sales transactions

      SQL> select num_rows, blocks*8192/1024/1024 mb

      2 from user_tables

      3 where table_name = 'SALES_TRANSACTIONS';

      NUM_ROWS MB

      —————————— ——————————

      10308870 1522.625


      lunes, 14 de enero de 2019

      ORAPWD

      1. Create the password file.  This is done by executing the following command
      cd $ORACLE_HOME/dbs
      $ orapwd file=filename  password=password entries=max_users

      filename = Nombre de la instancia. orapworcl  orapwacme

      Ejemplo orcl el archivo de password se debe llamar orapworcl

      miércoles, 26 de diciembre de 2018

      DUPLICATE LOCATION UNTIL TIME

      DUPLICATE target DATABASE TO 'TRGT'
      UNTIL TIME "TO_DATE('03/03/2011 20:04:00','MM/DD/YYYY HH24:MI:SS')"  #after controlfile backup
      SPFILE
      set memory_max_target='4g'
      set memory_target='4g'
      set control_files='/u02/oracle/TRGT/db/apps_st/data/cntrl01.dbf','/u10/oracle/TRGT/db/apps_st/data/cntrl02.dbf'
      set db_file_name_convert='/u10/oracle/SRCDB/db/apps_st/data','/u10/oracle/TRGT/db/apps_st/data','/u11/oracle/SRCDB/db/apps_st/data','/u11/oracle/TRGT/db/apps_st/data'
      set log_file_name_convert='/u10/oracle/SRCDB/db/apps_st/data','/u10/oracle/TRGT/db/apps_st/data','/u11/oracle/SRCDB/db/apps_st/data','/u11/oracle/TRGT/db/apps_st/data'
      set audit_file_dest='/u02/oracle/TRGT/admin/adump'
      set db_recovery_file_dest='/arch/flash_recovery_area'
      set diagnostic_dest='/u02/oracle/TRGT'
      BACKUP LOCATION '/arch/flash_recovery_area/SRCDB';

      viernes, 30 de noviembre de 2018

      CONFIGURE EXCLUDE FOR TABLESPACE

      RMAN> CONFIGURE EXCLUDE FOR TABLESPACE EXAMPLE;

      RMAN> SHOW ALL;

      RMAN configuration parameters for database with db_unique_name ORCL are:
      CONFIGURE RETENTION POLICY TO RECOVERY WINDOW OF 5 DAYS;
      CONFIGURE BACKUP OPTIMIZATION OFF; # default
      CONFIGURE DEFAULT DEVICE TYPE TO DISK; # default
      CONFIGURE CONTROLFILE AUTOBACKUP ON;
      CONFIGURE CONTROLFILE AUTOBACKUP FORMAT FOR DEVICE TYPE DISK TO '%F'; # default
      CONFIGURE DEVICE TYPE DISK PARALLELISM 1 BACKUP TYPE TO BACKUPSET; # default
      CONFIGURE DATAFILE BACKUP COPIES FOR DEVICE TYPE DISK TO 1; # default
      CONFIGURE ARCHIVELOG BACKUP COPIES FOR DEVICE TYPE DISK TO 1; # default
      CONFIGURE MAXSETSIZE TO UNLIMITED; # default
      CONFIGURE ENCRYPTION FOR DATABASE OFF; # default
      CONFIGURE ENCRYPTION ALGORITHM 'AES128'; # default
      CONFIGURE COMPRESSION ALGORITHM 'BASIC' AS OF RELEASE 'DEFAULT' OPTIMIZE FOR LOAD TRUE ; # default
      CONFIGURE RMAN OUTPUT TO KEEP FOR 7 DAYS; # default
      CONFIGURE EXCLUDE FOR TABLESPACE 'EXAMPLE';
      CONFIGURE ARCHIVELOG DELETION POLICY TO NONE; # default
      CONFIGURE SNAPSHOT CONTROLFILE NAME TO '/u01/app/oracle/product/12.1.0/db_1/dbs/snapcf_orcl.f'; # default

      RMAN>


      RMAN> CONFIGURE EXCLUDE FOR TABLESPACE EXAMPLE CLEAR;

      Tablespace EXAMPLE will be included in future whole database backups
      old RMAN configuration parameters are successfully deleted

      RMAN> show all;

      RMAN configuration parameters for database with db_unique_name ORCL are:
      CONFIGURE RETENTION POLICY TO RECOVERY WINDOW OF 5 DAYS;
      CONFIGURE BACKUP OPTIMIZATION OFF; # default
      CONFIGURE DEFAULT DEVICE TYPE TO DISK; # default
      CONFIGURE CONTROLFILE AUTOBACKUP ON;
      CONFIGURE CONTROLFILE AUTOBACKUP FORMAT FOR DEVICE TYPE DISK TO '%F'; # default
      CONFIGURE DEVICE TYPE DISK PARALLELISM 1 BACKUP TYPE TO BACKUPSET; # default
      CONFIGURE DATAFILE BACKUP COPIES FOR DEVICE TYPE DISK TO 1; # default
      CONFIGURE ARCHIVELOG BACKUP COPIES FOR DEVICE TYPE DISK TO 1; # default
      CONFIGURE MAXSETSIZE TO UNLIMITED; # default
      CONFIGURE ENCRYPTION FOR DATABASE OFF; # default
      CONFIGURE ENCRYPTION ALGORITHM 'AES128'; # default
      CONFIGURE COMPRESSION ALGORITHM 'BASIC' AS OF RELEASE 'DEFAULT' OPTIMIZE FOR LOAD TRUE ; # default
      CONFIGURE RMAN OUTPUT TO KEEP FOR 7 DAYS; # default
      CONFIGURE ARCHIVELOG DELETION POLICY TO NONE; # default
      CONFIGURE SNAPSHOT CONTROLFILE NAME TO '/u01/app/oracle/product/12.1.0/db_1/dbs/snapcf_orcl.f'; # default

      RMAN>


      RMAN> BACKUP DATABASE NOEXCLUDE;